Virasana: Hero Pose
YogiSource.com Staff
©Yoga People, LLC 2017
![]()
Pronunciation: veer-AWS-ahna)
Translation: In Sanskrit, Vira means hero. Asana means pose or posture.
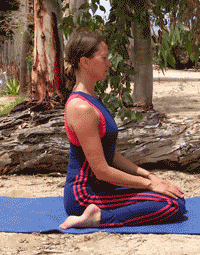
Introduction: This is a foundational seated posture. It is used for pranayama and meditation and for stretching out tight quadriceps muscles, opening tight ankles and providing therapy for heel pain and spurs. If your body cannot yet assume this pose or hold it comfortably use props as explained below and shown in the photos.
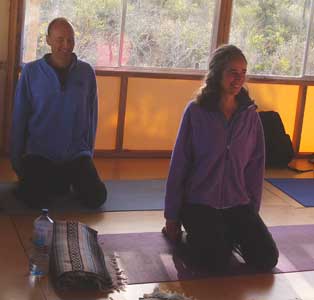
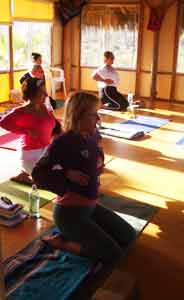
Technique: Start the pose with a spread out folded blanket covering your mat. This will protect the tops of your feet and make them more comfortable. The people in the photo are not using a blanket on their mat for comfort. The fifth photo down the page has a student using a blanket covering her mat though.
Use a prop or props as a support under your buttocks to provide enough height to assume and hold the pose. Place the props under your sit bones to raise your pelvis enough so your feel a good stretch yet are comfortable enough. Possible props include one or more foam blocks, a rolled blanket and/or a sandbag.
If you find that the pose causes knee pain for you it may often be alleviated by placing a rolled facecloth tightly in the inner crook of the painful bending knee. Keep the cloth in place as you lower your buttocks towards the floor. Begin by coming into a kneeling position on your knees at the front of the mat. In this pose your kneecaps should be aligned vertically rather than tilting. This will help align the inner knee and avoid knee discomfort or injury.
To bring your kneecaps into better vertical alignment, hold onto your calves and roll them to the outside while you roll your upper thighs inwards as you lower yourself into the pose. Grasp each of your calves with your thumbs on your inner legs and fingers the outer. Use the hands to roll the lower legs towards the floor on the outside of each lower leg.
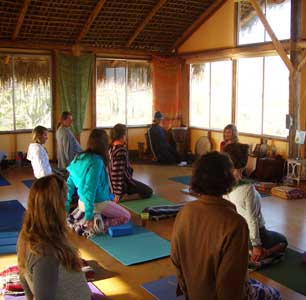
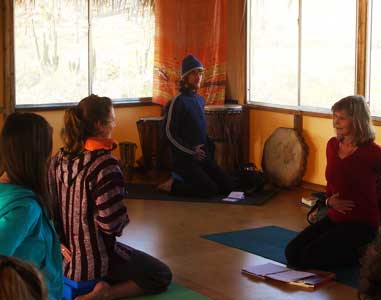
Descend your buttocks between your feet to or towards the floor. As you descend and throughout the pose attempt to keep as much weight on the tops of the little toes as you have on the tops of your big toes. If you still experience discomfort in the knees or cannot yet lower your buttocks to the floor you should provide support under your sit bones. Observe our photos of a yoga class being instructed in this posture. Notice how the students do it different ways using differing props of differing heights depending on their flexibility. If your hips sink low enough, the inner sides of your feet should touch the sides of your hips. If your hips do not fully descend, the feet should still be positioned so that the hips would be between them if you could descend lower.
Actions of the Legs and Feet: Move the calves outward as you sit down between your feet. Do so gradually. Bring the feet toward your hips so they are next to your body.
After you have descended as far as possible, pull the skin that is under the knee up your leg to release pressure on your knees. To do so, lift the each knee slightly and insert your fingers under the knee and pull to move the skin of the shin towards the knee.
The tops of the feet should be hip width apart on the mat and parallel to each other. Center your weight on the center of each foot. Spread your toes out and bring the little toes to the floor. Keep equal weight on the top of each of your toes. If your heels swing in towards your hips then there will be more weight on the tops of the inside of each foot then the outside. Correct this by moving your heels out until the weight is equally distributed.
If the stretch is too much for your ankles, put a rolled facecloth or small towel under each ankle so it won’t stretch so much. Ditto for the knees, a small rolled facecloth can go in the crease behind your knee before as you kneel down which gives relief for those with sensitive knees. Those with knee problems should avoid the pose all together unless advised by a knowledgeable teacher.
Listening to your body is important in yoga as is having a good teacher to learn the poses from, which can be invaluable, especially to those with any sort of physical condition.
How to Work the Upper Body: Establish a “tadasana” of the torso. Align your upper torso so you are upright, with your outer shoulders lined up with your side hip bones. Keep your spine elongated. Lift your rib cage and sternum up from your pelvis. Ground your sit bones on the floor as your extend the spine, and raise the crown of the head toward the sky. Soften your abdomen and breathe. Take long relaxed breaths in the pose.
Coming out of the pose: Lift up onto your knees. Cross your lower legs behind you. Carefully sit down with your buttocks landing on the other side of your crossed legs so you are in Sukhasana, or seated cross legged pose. Rest and relax.
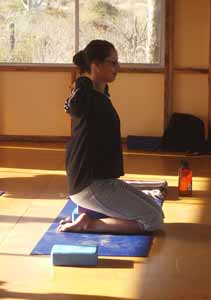
Build up your time in the pose each time you do it, starting at a minute and going longer. If you are meditating or doing pranayama breathing practice, use a higher support for even greater comfort as you will be holding the pose longer and want your attention to focus on the meditating or breathing practice as well.
You may want to try Supta Virasana (not shown on this page), the reclining version of this posture, with or without props. Many like to lean back on a bolster with a folded blanket under the head. See http://www.yogisource.com/ydc/enlighten/enlighten_document.asp?ID=398§ion=9&cat=144 for details.
Beginner’s Tip: For Virasana, make yourself comfortable with a high enough support underneath. See the examples shown in the yoga class photos on how to do this. Use props like blocks or blankets. Each time you do Virasana, you get more flexible. Over time you should find that you need less and less support until the day when you can do the pose comfortably without needing any props to elevate your pelvis. A thick layer of blanket and mat under you will feel good under the tops of your feet. If you are uncomfortable in your knees while staying in Virasana for longer periods make your support higher in order to sit comfortably for an extended time. One method is to use two foam blocks on end under your sit bones. Or, if you need additional height, try three blocks with the first two on end and the third on top of them to construct a more elevated platform.The woman in the top photo is very flexible and doesn't need props, so this is what you are aiming for as you gain flexibility. However, be comfortable and use props if you need them.
Benefits: This pose stretches the thighs, knees, and ankles.
It strengthens the arches of the feet.
Improves digestion and relieves gas, and may help constipation.
Virasana helps relieve the symptoms of menopause.
It also reduces swelling of the legs during pregnancy (through second trimester) . See http://www.yogisource.com/ydc/enlighten/enlighten_document.asp?ID=398§ion=9&cat=144 for Supta Virasana which is also highly recommended for pregnant women using a bolster or two for support under the back when reclining.
Contraindications, Cautions and Therapuetic Suggestions:
Virasana may be therapeutic for high blood pressure and asthma. If you have high blood pressure, make the pose comfortable and find the restfulness in the posture, listening to a meditation CD if that appeals to you. If you have asthma, focus on having an open wide ribcage and allow deep long breaths in and out, consciously taken.
If you have a headache, practice this pose lying back on a bolster in http://www.yogisource.com/ydc/enlighten/enlighten_document.asp?ID=398§ion=9&cat=144 Virasana. Some like to use an Indian Head Wrap or Ace bandage around their head and eyes for getting rid of the headache.
If you have any knee or ankle injury, please avoid this pose unless you have the guidance of an experienced yoga teacher.
Thanks to yoga teacher and co-founder of Yoga.com Victor Oppenheimer for his editing of this article.Thanks to students at Yandara Yoga Institute for allowing photos, all taken by ©Yoga People, LLC. Lena Nyholm is the in the first photo of Virasana at the top, and we thank her.
Copyright © 2008
Yoga People LLC
All rights reserved
|


